Transformers Bumblebee Birthday Cake
Last week, my son turned 5. I have been a wee bit slow to get this post going. Just the craziness and excitement from Eric's birthday party and family visiting has been one thing. Then I got him registered for Kindergarden. While at the doctor for his regular well-child check up, she discovered he had something stuck in his ear. She couldn't get it out.
Two days later, we got in to see the ENT specialist, who quickly flushed out two small chunks of rubber playground mulch. I'm happy to say, Eric is totally back to normal. So with that weight off of my mind, I was able to get back to the birthday cake recap.
Now, since this is where I do recipes and sometimes toss in a little family stuff for good measure, let me just say, this cake was the best tasting one I have ever made. I've made this recipe quite a few times, but the strawberry mousse filling really set it apart. I love that this cake is technically a yellow cake, but it's not a deep yellow like store-bought cake mix in a box. And the whole reason I made this cake? Eric asked for my homemade yellow cake with strawberry filling. He asked for a Transformer theme. I took it to the next step with the car shape.


One more note. Carving cakes into a shape and then decorating them is really difficult. I like a challenge sometimes, and boy was I swearing at this one. I totally understand the concept of a crumb-coat now. Seal those little buggers so the outside looks nice and smooth. I did have some issues with the sugar paste accessories cracking when I went to stick them to the cake. I think they weren't dry enough and the icing was a tad stiff. Still, I got it to work. I also discovered Duff Goldman spray paint food coloring at Michael's. That stuff is awesome! The Wilton spray food coloring totally sucked next to the Duff stuff.
All in all, the cake looked pretty good. It was recognizable as Bumblebee, the Transformer. My sister-in-law wasn't aware of the Transformer character and thought I was making a giant cutesy insect bumblebee. Nope. Transformer.
Anyhow, the day of the party went well. All the kids had fun together We rented a bounce house so it was busy the entire time. We had kids bouncing, eating pizza, more bouncing, eating cake and ice cream, more bouncing, opening presents, and more bouncing. Honestly, I was worried that someone was going to throw up from eating and bouncing. That didn't happen (thank goodness! knock on wood!)
One more note before I provide recipes. I made two 9"x13" cakes for this and layered them together. The recipe below is enough for one 9"x13" or two 9" rounds. I also made two batches of frosting and a double batch of Strawberry Mousse for this.
Ingredients
for my favorite, perfect yellow cake
3 cups cake flour
2 1/2 teaspoons baking powder
1/2 teaspoon salt
1/2 cup + 2 Tablespoons butter, softened to about room temperature
1 3/4 cups granulated sugar
2 eggs
1 1/4 cups milk
1 1/2 teaspoons vanilla extract
Method
for the cake
1. Sift together the cake flour, salt, and baking powder. Set aside.

2. Using an electric mixer, beat the butter until it's smooth. Add the sugar and beat until mixed well.
3. Add the eggs and vanilla to the butter and beat again.

4. Add about a third of the flour mixture to the bowl with about a third of the milk and beat until combined. Repeat with more flour and milk in two more additions until all has been mixed in. Scrape down the sides of the bowl and beat on medium-high speed for one minute.


5. Pour into a generously sprayed 9"x13" pan. (I used my favorite nonstick spray Baker's Joy with flour.) Smooth out the top. Bake at 350F for 30-35 minutes, or until a toothpick inserted in the center comes out clean.

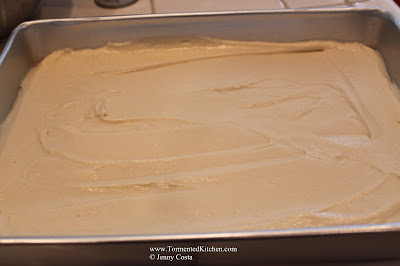
6. Let cool in the pan. Tip out onto a large flat cookie sheet to decorate.

Ingredients
for Vanilla Buttercream Frosting
1/2 cup plain shortening
1/2 cup butter, softened to room temperature
4 cups confectioners sugar
1 teaspoon vanilla extract
about 2 Tablespoons milk
Method
for the frosting
1. With an electric mixer, combine the shortening and butter. Mix. Add vanilla extract. Mix.
2. Add one cup of powdered sugar and beat until combined. Repeat until all mixed in, using one cup additions.
3. Add the milk and mix. Scrape down the sides and mix again. If you want it thinner, add a little more milk.
To assemble the cake
After the cakes have cooled, make your first batch of frosting. Keep it on the counter since you will use it right away. Make a double batch of Strawberry Mousse Filling.
Using Glide dental floss, slice both 9"x13" cakes in half. To do so, place one whole cake upside down onto a flat platter. Wrap floss around your fingers and slice cake lengthwise horizontally, pulling floss toward yourself. Repeat with other cake.
Place one whole cake on your presentation platter. Slide some strips of wax paper underneath it to protect the platter from smears.
Carefully slide the top cake layer onto a flat cookie sheet to move it out of the way. Spread about a third of the Strawberry Mousse Filling over the layer. Replace cake layer. Cover that with Strawberry Mousse Filling. Place the next cake on top. Repeat moving the top layer with the flat cookie sheet. Spread more Strawberry Mousse Filling and finally replace the top layer of cake. The layers don't have to line up perfectly for this since carving is involved.


Make another batch of frosting, tinted Bumblebee yellow. Spread over the whole cake. This layer is the exterior, so you want it to look good. Make it as smooth as possible. Return cake to fridge and keep it there so the filling doesn't go bad and to firm the outside.
When the car has set up a bit, cut some window templates from wax paper and hold up to the cake. Spray blue Duff food spray paint for windows.
Using a paint brush and watered down black gel food coloring, hand paint the stripes and any other detailing you want. I added a front grill and some squares on the rear where tail lights would be.

Place the dry Transformer emblem and wheels using a little extra frosting for glue. Use two small circles on the front as headlights.


Two days later, we got in to see the ENT specialist, who quickly flushed out two small chunks of rubber playground mulch. I'm happy to say, Eric is totally back to normal. So with that weight off of my mind, I was able to get back to the birthday cake recap.
Now, since this is where I do recipes and sometimes toss in a little family stuff for good measure, let me just say, this cake was the best tasting one I have ever made. I've made this recipe quite a few times, but the strawberry mousse filling really set it apart. I love that this cake is technically a yellow cake, but it's not a deep yellow like store-bought cake mix in a box. And the whole reason I made this cake? Eric asked for my homemade yellow cake with strawberry filling. He asked for a Transformer theme. I took it to the next step with the car shape.


One more note. Carving cakes into a shape and then decorating them is really difficult. I like a challenge sometimes, and boy was I swearing at this one. I totally understand the concept of a crumb-coat now. Seal those little buggers so the outside looks nice and smooth. I did have some issues with the sugar paste accessories cracking when I went to stick them to the cake. I think they weren't dry enough and the icing was a tad stiff. Still, I got it to work. I also discovered Duff Goldman spray paint food coloring at Michael's. That stuff is awesome! The Wilton spray food coloring totally sucked next to the Duff stuff.
All in all, the cake looked pretty good. It was recognizable as Bumblebee, the Transformer. My sister-in-law wasn't aware of the Transformer character and thought I was making a giant cutesy insect bumblebee. Nope. Transformer.
Anyhow, the day of the party went well. All the kids had fun together We rented a bounce house so it was busy the entire time. We had kids bouncing, eating pizza, more bouncing, eating cake and ice cream, more bouncing, opening presents, and more bouncing. Honestly, I was worried that someone was going to throw up from eating and bouncing. That didn't happen (thank goodness! knock on wood!)
One more note before I provide recipes. I made two 9"x13"
Ingredients
for my favorite, perfect yellow cake
3 cups cake flour
2 1/2 teaspoons baking powder
1/2 teaspoon salt
1/2 cup + 2 Tablespoons butter, softened to about room temperature
1 3/4 cups granulated sugar
2 eggs
1 1/4 cups milk
1 1/2 teaspoons vanilla extract
Method
for the cake
1. Sift together the cake flour, salt, and baking powder. Set aside.

2. Using an electric mixer, beat the butter until it's smooth. Add the sugar and beat until mixed well.
3. Add the eggs and vanilla to the butter and beat again.

4. Add about a third of the flour mixture to the bowl with about a third of the milk and beat until combined. Repeat with more flour and milk in two more additions until all has been mixed in. Scrape down the sides of the bowl and beat on medium-high speed for one minute.


5. Pour into a generously sprayed 9"x13" pan


6. Let cool in the pan. Tip out onto a large flat cookie sheet to decorate.

Ingredients
for Vanilla Buttercream Frosting
1/2 cup plain shortening
1/2 cup butter, softened to room temperature
4 cups confectioners sugar
1 teaspoon vanilla extract
about 2 Tablespoons milk
Method
for the frosting
1. With an electric mixer, combine the shortening and butter. Mix. Add vanilla extract. Mix.
2. Add one cup of powdered sugar and beat until combined. Repeat until all mixed in, using one cup additions.
3. Add the milk and mix. Scrape down the sides and mix again. If you want it thinner, add a little more milk.
To assemble the cake
After the cakes have cooled, make your first batch of frosting. Keep it on the counter since you will use it right away. Make a double batch of Strawberry Mousse Filling.
Using Glide dental floss, slice both 9"x13" cakes in half. To do so, place one whole cake upside down onto a flat platter. Wrap floss around your fingers and slice cake lengthwise horizontally, pulling floss toward yourself. Repeat with other cake.
Place one whole cake on your presentation platter. Slide some strips of wax paper underneath it to protect the platter from smears.
Carefully slide the top cake layer onto a flat cookie sheet to move it out of the way. Spread about a third of the Strawberry Mousse Filling over the layer. Replace cake layer. Cover that with Strawberry Mousse Filling. Place the next cake on top. Repeat moving the top layer with the flat cookie sheet. Spread more Strawberry Mousse Filling and finally replace the top layer of cake. The layers don't have to line up perfectly for this since carving is involved.

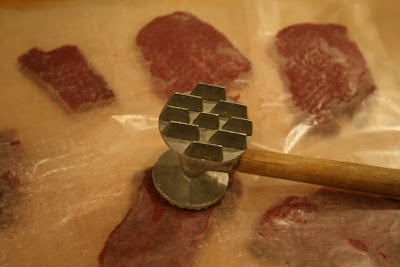
I used a large serrated bread knife to carve the cake into a car-like shape. About 4" from one end, slice downward angled toward the longer side. Only go about 1" deep. Shave the longer section to shape into the hood. Trim to make the front end. Repeat for the rear end. Save the scraps for snacking.
Use one whole batch of buttercream frosting tinted yellow. You will want this batch to be slightly thinner than normal. Spread frosting over everything. This is your "crumb coat". It doesn't have to be prefect. You can knock down lumps after it has set up a bit. Let the cake rest in the fridge until the crumb coat is firm. Give it at least an hour.

Make another batch of frosting, tinted Bumblebee yellow. Spread over the whole cake. This layer is the exterior, so you want it to look good. Make it as smooth as possible. Return cake to fridge and keep it there so the filling doesn't go bad and to firm the outside.
Meanwhile, make some sugar gum paste dough  and make 4 medium circles and 6 little circles and a cool Transformer Autobot emblem. Let them dry completely. When dry, spray the emblem and small circles with the silver Duff food spray paint
 . Spray the larger circles, the "tires" with black
 .
.
When the car has set up a bit, cut some window templates from wax paper and hold up to the cake. Spray blue Duff food spray paint
Using a paint brush and watered down black gel food coloring, hand paint the stripes and any other detailing you want. I added a front grill and some squares on the rear where tail lights would be.

Place the dry Transformer emblem and wheels using a little extra frosting for glue. Use two small circles on the front as headlights.


And finally, the photo off of the box of the real Bumblebee, for comparison.

Not bad for little ol' me. If I had more time, I would have made the grill out of sugar paste and I would have made better rims. Still, not bad for my first shaped-cake attempt. Don't count on seeing more shaped cakes. Unless I get the fondant bug. I will leave it at that.
Your cake looks awesome! I bet your son was trhilled by it. I've always wanted to attempt a shaped cake, but I'm still having trouble with "round".
ReplyDeleteT.