French Bread

OMHYGOODNESS! I have been absolutely crazy for bread. I tried one of those "no-knead" recipes (with a few minor adaptations) and it turned out very well. I had the big stand mixer handy just in case, but I didn't actually need it.
I had been planning on making bread for a few weeks now. I made time yesterday and recruited my son to help. A little boy, just shy of 4 years old, is actually an excellent assistant for this since it doesn't require the stove until the very end.
Eric lost interest about half way into the first raise. No surprise there. I let him go play with the neighbor's girl, while I kept up with the dough. I ended up letting the dough rise extra after I shaped them into loaves. I have noticed that when baking here (high altitude and low humidity) that sometimes you have to really watch things during rising so it doesn't get dehydrated. Damp towels, plastic wrap and steamy spots in the kitchen help me get successful results.
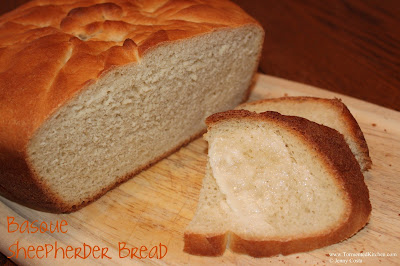
I baked up the loaves and they came out of the oven beautifully. We let them cool and then dug in. The kids devoured their bread in no time.

One of my concerns about a "no-knead" recipe, was how the texture would turn out. I have used a bread machine for years. In fact, I have used two machines to death and I'm on a third. The worst thing about bread from a bread machine is that it's really dense. This was not the case. Great color. Hard crust. Nice airy texture. It was about as good as regular bakery bread.
Ingredients
2 cups water, about 110F
1 teaspoon sugar
2 Tablespoons active dry yeast
5 cups bread flour
3 teaspoons salt
extra flour for the work surface
butter for greasing the baking sheet
Method
1. Put the water in a large mixing bowl. Sprinkle yeast into the warm water. Sprinkle sugar on top. Gently stir. Let it rest, to proof, for 10 minutes

2. After 10 minutes, make sure the yeast is active. It should be foamy. (If your yeast mixture is not foamy at this point, you may have bad yeast, water that is too hot or too cold, or added salt in the wrong step.)
3. Add 2 cups of flour to the foamy yeast mixture. Stir until smooth.

4. Add the remaining flour and salt to the bowl and stir until the dough pulls away from the bowl and starts to get stringy and elastic. Ideally, it should be smooth and sort of shiny. If it's still pretty sticky, add a few more tablespoons of flour and work it in.

5. Cover bowl with plastic wrap and let the dough rise in a warm place until doubled, 30-40 minutes. I set the bowl by the dishwasher steam and gave it 30 minutes. (This is the first rise.)
6. Lightly flour your work surface. Dump dough out and knead about three times. (One knead cycle would be Flatten, Fold over, Turn 90 degrees clockwise.)

7. Lightly butter a fresh bowl, place dough in this bowl. Cover with plastic wrap and let rise until doubled, 30-40 minutes. (This is the second rise.)

8. Repeat step 6.
9. Return dough to the buttered bowl. Cover with plastic wrap and let rise until doubled, 30-40 minutes. (This is the third rise.)
10. Dump dough onto work surface. Divide dough. This recipe is enough for two large loaves (cut the dough in half) or about 10 small-ish sandwich rolls. Let the dough rest about 10 minutes after cutting. You may want to cover the dough so it doesn't dry out.
I made one large loaf and four mini-loaves.

11. Begin to shape the cut dough into cylinders by rolling with your hands. Place shaped loaves onto buttered baking sheets. Cut three diagonal slices into each loaf about 1/2 inch deep. Cover and let rest another 30 minutes to 1 hour, or until roughly doubled.

12. Preheat oven to 450F.
13. When you are ready to bake, reduce heat to 400F. Spritz loaves with water as you put them in. Bake 25-35 minutes. Mine took 29 minutes.

14. Move bread to a wire rack to cool completely. Enjoy!


Comments
Post a Comment